Difference between revisions of "Security Tokens"
Jump to navigation
Jump to search
| Line 1: | Line 1: | ||
=== Overview === | === Overview === | ||
==== '''PRS governs user rights to access modules and actions via Security Tokens''' ==== | |||
* Tokens may allow or restrict rights to view, edit, create or delete on a certain screen | * Tokens may allow or restrict rights to view, edit, create or delete on a certain screen | ||
* Tokens may also allow or restrict rights to do specific actions (e.g. "Can Archive Deliveries") | * Tokens may also allow or restrict rights to do specific actions (e.g. "Can Archive Deliveries") | ||
Latest revision as of 09:26, 3 February 2023
Overview[edit | edit source]
PRS governs user rights to access modules and actions via Security Tokens[edit | edit source]
- Tokens may allow or restrict rights to view, edit, create or delete on a certain screen
- Tokens may also allow or restrict rights to do specific actions (e.g. "Can Archive Deliveries")
- Users can be assigned default access or restrictions based on their Security Groups (see Part 2)
View or change an individual user's Security Tokens:[edit | edit source]
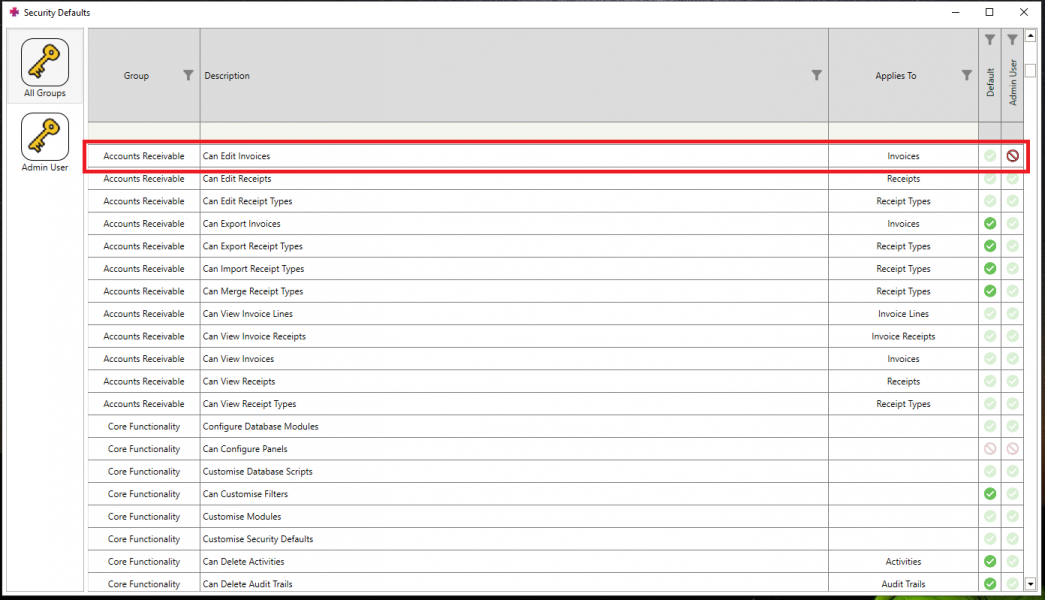
1. Open the System Tab → Security Defaults
2. Find the token to be changed (grouped by functionality)
3. Find the user to change tokens for (top right)
4. Click the appropriate square to enable / disable as needed. Green or light green is enabled, red is disabled
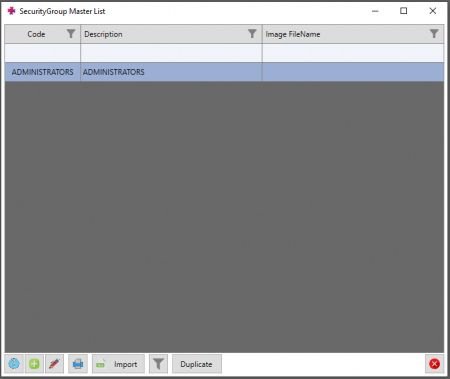
View or change Security Groups (for a group of Users)[edit | edit source]
1. Open the Human Resources tab → User Accounts
2. Find the "Setup" button on the top right → open Security Groups
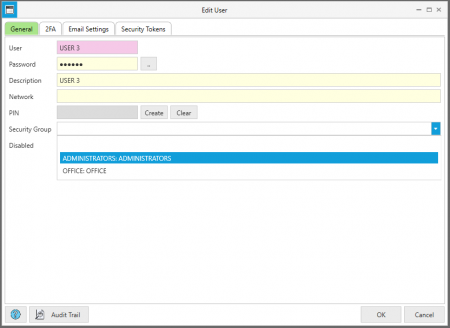
3.Edit an existing group or create a new one (green plus button on the bottom left corner) 4 Users can be added to a security group by editing the User


