Issuing Stock: Difference between revisions
Jump to navigation
Jump to search
No edit summary |
|||
| (One intermediate revision by the same user not shown) | |||
| Line 2: | Line 2: | ||
There are two main ways to issue stock on PRS: | There are two main ways to issue stock on PRS: | ||
* Issue stock directly from a stock location | |||
* Issue via Requisitions (AKA picking lists) | |||
**The advantage to issuing via Requisitions is that the data history can be traced further back and links stock movements to Requisitions, instead of existing in isolation | |||
=== Issuing from a stock location === | === Issuing from a stock location === | ||
| Line 15: | Line 16: | ||
* Select a holding to issue from → click the red Issue button [[File:Issue button.png|frameless]] | * Select a holding to issue from → click the red Issue button [[File:Issue button.png|frameless]] | ||
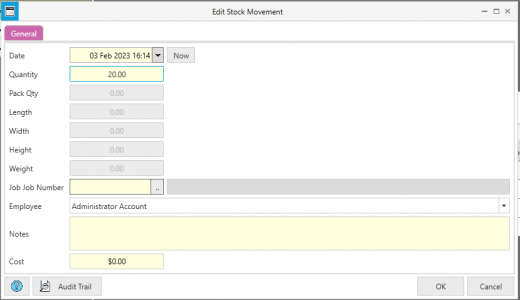
* Fill in details such as Quantity, Employee, Job and Notes as required and press OK. The transaction will now be reflected in Stock Movements [[File:Issue stock.png|frameless|520x520px]] <br /> | * Fill in details such as Quantity, Employee, Job and Notes as required and press OK. The transaction will now be reflected in Stock Movements | ||
*[[File:Issue stock.png|frameless|520x520px]] <br /> | |||
==== Mobile ==== | ==== Mobile ==== | ||
Latest revision as of 22:35, 7 February 2023
Overview
There are two main ways to issue stock on PRS:
- Issue stock directly from a stock location
- Issue via Requisitions (AKA picking lists)
- The advantage to issuing via Requisitions is that the data history can be traced further back and links stock movements to Requisitions, instead of existing in isolation
Issuing from a stock location
Desktop
- Navigate to Product Management → Stock Locations
- Choose a stock location to issue items from. The current holdings (stock) is displayed on the right hand side of the screen

- Select a holding to issue from → click the red Issue button

- Fill in details such as Quantity, Employee, Job and Notes as required and press OK. The transaction will now be reflected in Stock Movements

Mobile
Issuing via Requisitions
Desktop
Overview
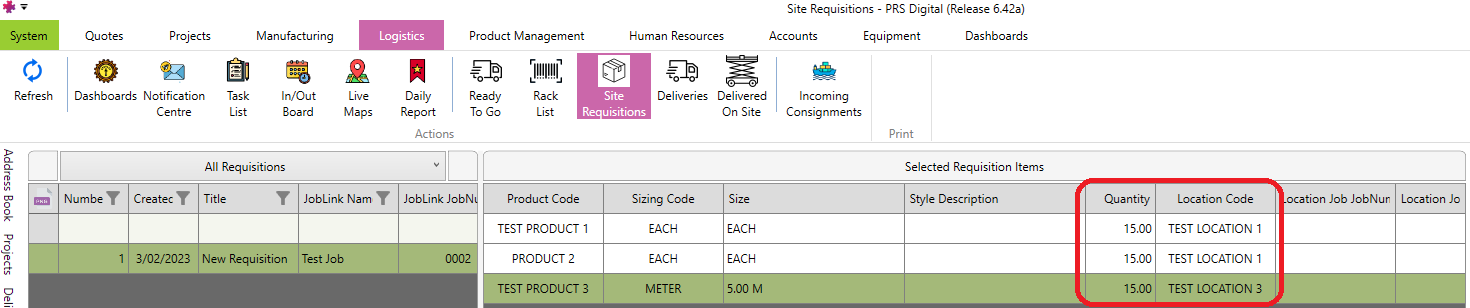
- Navigate to Logistics → Site Requisitions (name could be changed in the future)
- Create a new Requisition or select an existing one from the list. Filter the list as needed using the dropdown menu at the top of the list
- The items (Requisition Items) on the Requisition are displayed in the middle grid, and will refresh when selecting a different requisition
- Add or edit items in the list as desired
- When adding, first select the product required, then double click to edit and change details like quantity and the specific stock holding to take from
- Ensure that Quantity and Location are filled in for each item

Progressing Requisition Status
- A Requisition needs to go through 3 stages to be complete
- Filled - when all the required items have been added to the requisition
- Delivered or Taken By an Employee - when the items have been taken from stock
- Stock Holdings updated - when the corresponding transactions have been completed.
- Each item must have a holding to issue from, otherwise PRS will be unable to generate stock movements
- Use the buttons in the bottom right of the screen to progress through the stages
