Stocktakes
Overview
- Stocktakes on PRS can be used to ensure stock levels represented in the system are accurate
- A physical check of the stock levels is compared to the stock levels represented in PRS for the selected locations
- Relevant stock movements are then generated to correct any differences between the physical check and the PRS figures
- Lines that have not changed will still produce a zero quantity stock movement, in order to maintain a record of what has been checked
Desktop
Starting a Stock Take using selected locations
- Go to Product Management → Stock Locations → Select the Locations to Stocktake → Select the
 button at the bottom of the list

Using the Stock Take Screen
- All Stock Holdings for the selected Locations are combined in one list. The columns for this grid are fixed
- The quantity for each holding is shown as "Original Qty"
- "Actual Qty" can be typed in to, and is used to fill in quantities observed during the physical stocktake. This is defaulted to 0
- The
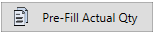 button can be used to copy over any numbers in "Original Qty" to "Actual Qty"
 - The
 button can be used to reset "Actual Qty" of all lines to 0
 - The
 button is the recommended way to generate a sheet for printing out before a stocktake. The generated excel sheet has the same columns as the Stock Take grid

Saving
- Press the OK button to save (Cancel will lose any unsaved work)
- Each line in the Stock Take will produce a Stock Movement when the Stock Take is saved
- Identical quantities will produce a Stock Movement with zero received and zero issued (basically a transaction to note that this line has been checked, even though nothing has changed)
- A higher actual quantity will produce a Stock Movement with the difference as the amount received
- A lower actual quantity will produce a Stock Movement with the difference as the amount issued
- An actual quantity of zero will produce a Stock Movement that issues the entire amount for the original quantity (that holding is no longer there)
Example Excel File for Printing Out
