Server Configuration
Jump to navigation
Jump to search
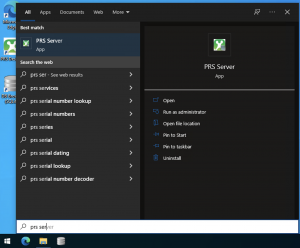
PRS Services are configured using the PRS Server Control Panel, which is available from the start menu.
Click Start, and type in "PRS Server" to locate this app in the programs menu: (Windows 10 shown here, other operating systems may vary slightly)
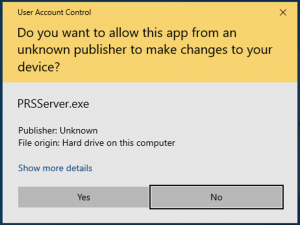
Click the PRS Server app to begin configuration. If a security prompt appears, click "Yes" to continue:
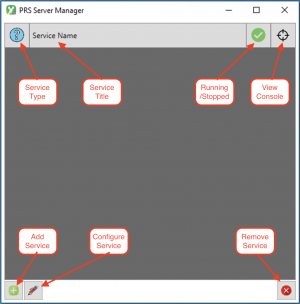
Once the program has started, you will see the main PRS control panel:
From this screen you can view and control the installed PRS Services on this machine
- The "Service Type" column indicates the type of selected service (Database, GPS, AutoDiscovery, or Scheduler) in operation
- The "Service Title" displays the description of the installed service
- The "Running/Stopped" column indicates either a "tick" for running services, or a "pause" image for stopped services Clicking on this column will also start or stop the selected service
- The "View Console" column will display a "target" image for running services, which you can click to display a debug console to monitor service activity.
You can also add, configure, and remove services from this screen:
- To add a new service, click the "Add Service" button at the bottom left.
- To configure the properties of a selected service, click the "Edit Service" button, also at the bottom left of the screen.
- To remove a service, click the "Remove Service" at the bottom right of the screen.
More Information[edit | edit source]
For further details on creating and configuring PRS Services (engines), please click on one of the links below:


