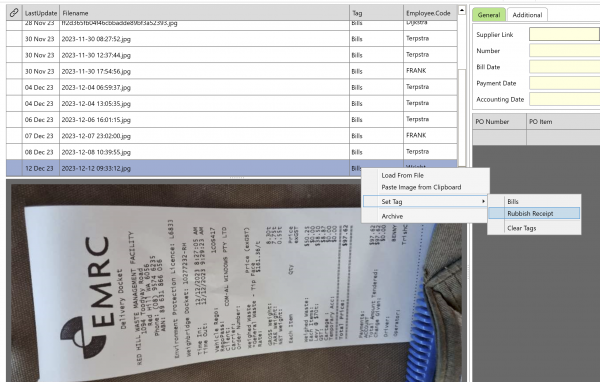
Data Entry Tag
Jump to navigation
Jump to search
To set up new tags, do the following:
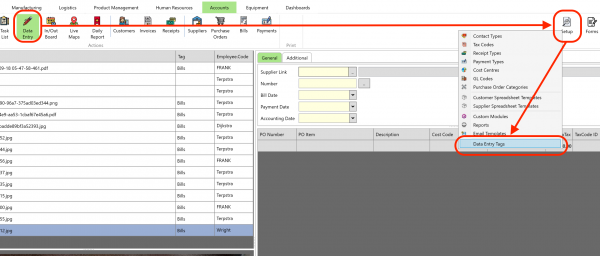
1) In PRS, open the Data Entry Screen, and then go to “Setup / Data entry Tags” on the right-hand side.
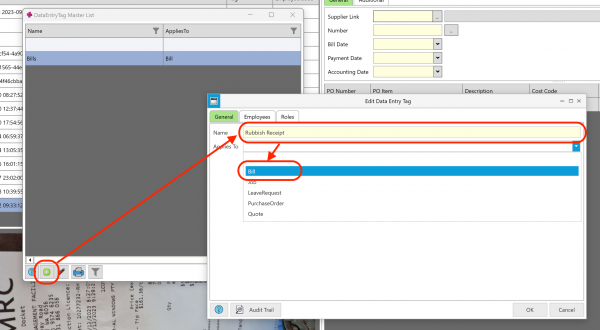
2) Click the “+” to create a new Tag - in this case I am creating a “Rubbish Receipt” Tag .
It will be entered in the system as a Bill, so we select that from the list:
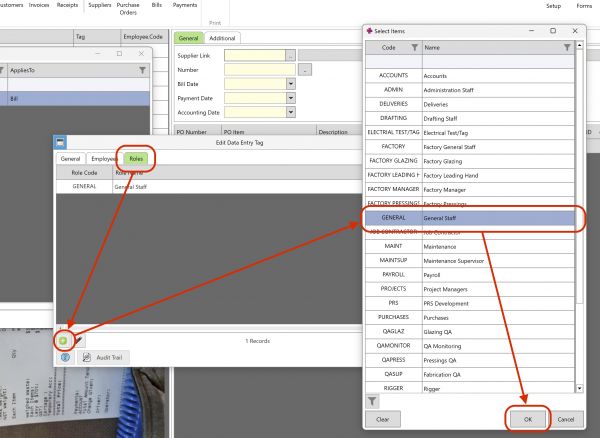
3) *** IMPORTANT ***. Go to the “Roles” Tab and add the required Employee Roles that will be able to see this tag on the desktop.
Once you’ve add the role, click OK to save the Tag.
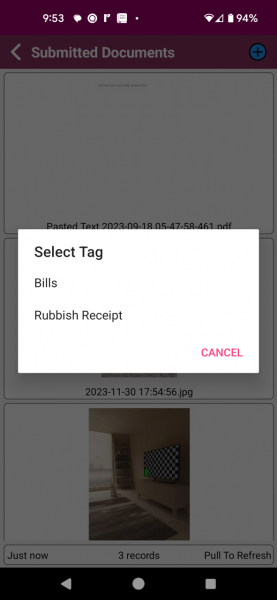
4) The tag should now appear on both the mobile app and the desktop:
