Receiving Stock
Jump to navigation
Jump to search
Overview[edit | edit source]
There are two main ways to receive stock on PRS
- Receiving directly to a Stock Location
- Receiving a Purchase Order
- The advantage to receiving a Purchase Order is that the data history can be traced further back and links stock movements to an order, instead of them existing in isolation
Receiving Directly to a Location[edit | edit source]
Desktop[edit | edit source]
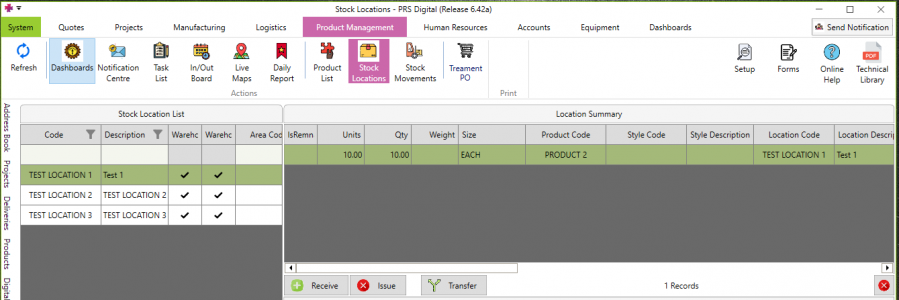
- Navigate to Product Management → Stock Locations
- Choose a stock location to receive items to. The current holdings (stock) is displayed on the right hand side of the screen
- Click the green Receive button

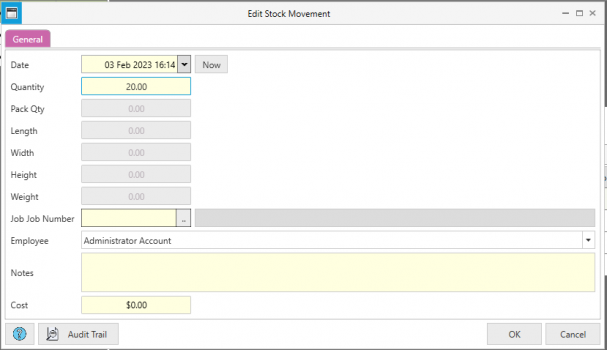
- Fill in details such as Quantity, Employee, Job and Notes as required and press OK. The transaction will now be reflected in Stock Movements
Receiving a Purchase Order (recommended way is via Mobile to take advantage of photo records)[edit | edit source]
Desktop[edit | edit source]
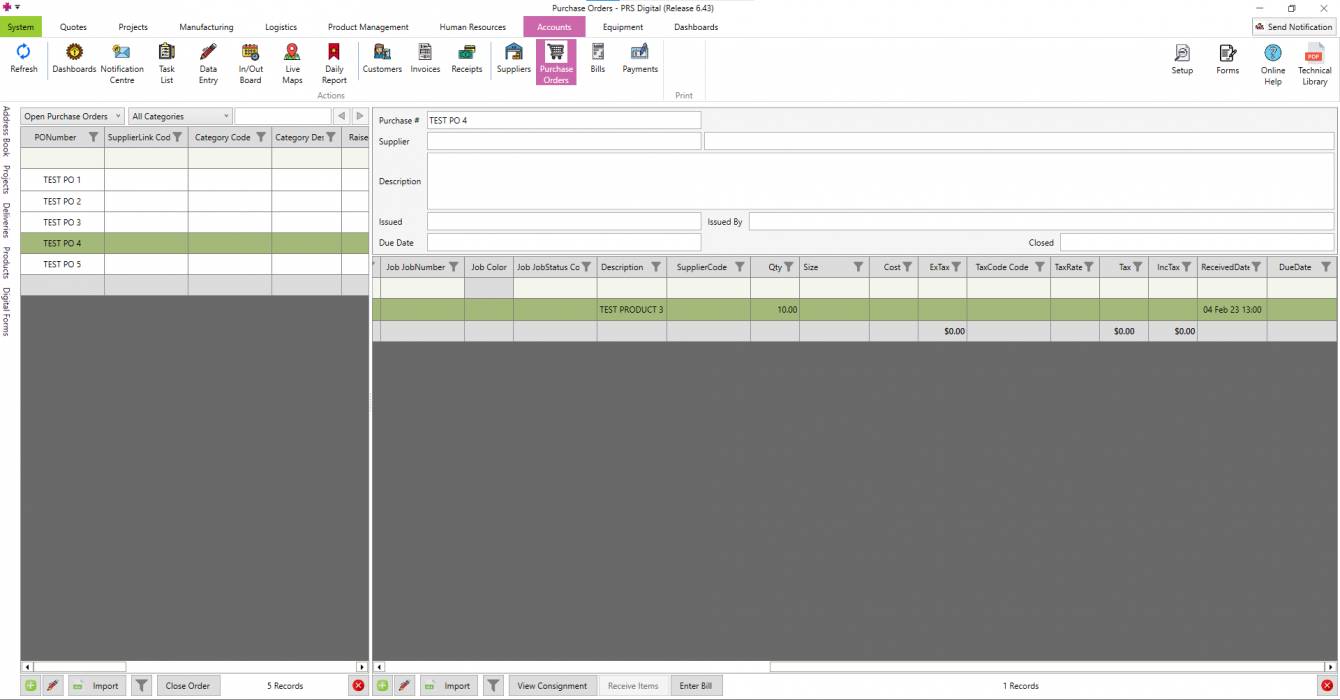
- Go to Accounts → Purchase Orders
- Select a Purchase Order to receive from the list on the left side. The items on that order (Purchase Order Items) are displayed in a list of the right side of the screen
- Select the items to receive, then press the Receive Items button at the bottom of the list
- This way of receiving a Purchase Order does not allow photos, and requires that items received have their default locations set up
Mobile[edit | edit source]
Purchase Orders Screen[edit | edit source]
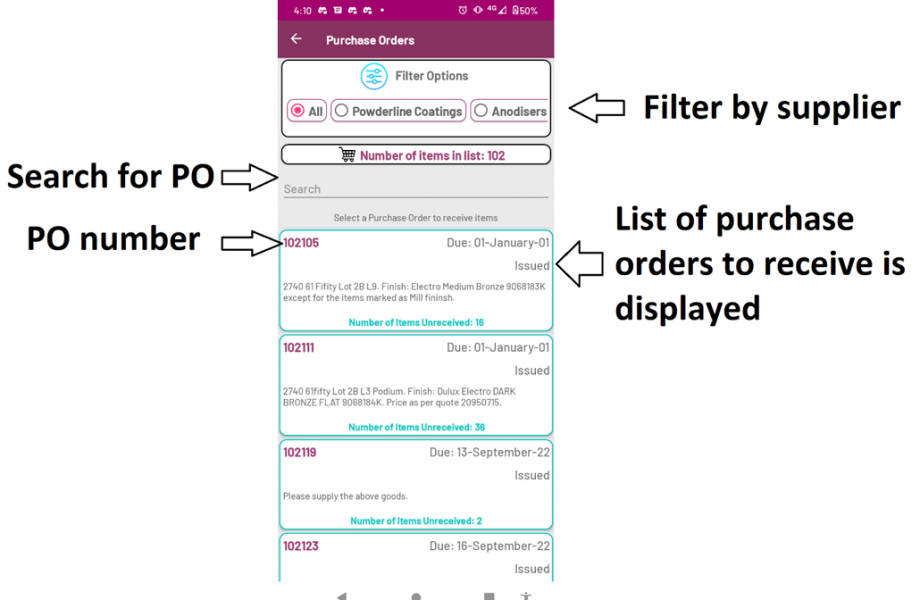
- Go to Warehousing
 → then open the Receivals submodule
- The list of Purchase Orders to receive is shown → tap one to open
Receivals Screen (Purchase Order Opened)[edit | edit source]
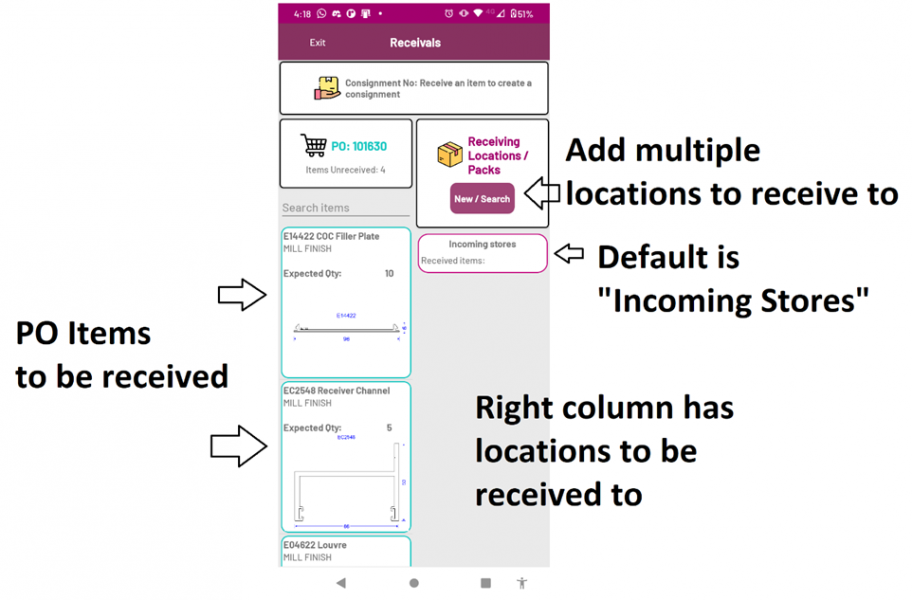
- The next screen shows details of the Purchase Order
- The left column contains Purchase Order Item Lines (PO Items) that are unreceived
- The right column contains locations and items that have been received to each location
- Tap on an item to receive it
- When the first item is received, a consignment is automatically created which will have the items received added to it (a purchase order may arrive in several consignments)
Part A - Confirm Purchase Order Item Details[edit | edit source]
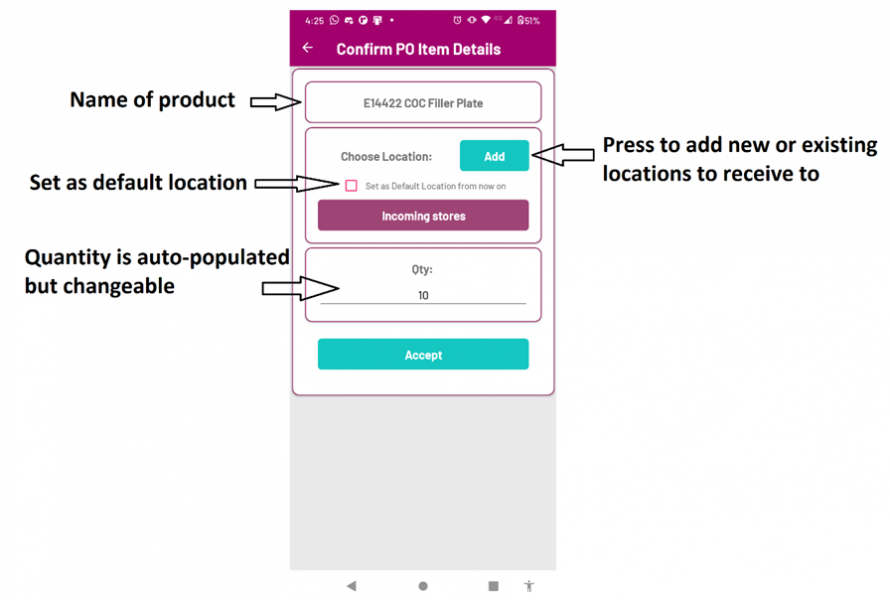
- A pop up screen for that line item is displayed
- A location will be populated on the blue button, IF the item has a default location set in PRS
- Otherwise, press the blue Add button to choose another location to receive the item to (if this is not set, then the item will end up in the default location for all items)
- If the location for that item has not been created in PRS, you are able to create one by pressing the blue add button, and selecting “New Location”. See Part B for how to create a new location on the Mobile while receiving items
- Once a location is selected, you can tick the box to set that location as the default location for that product from now on
- Change the quantity if required
- Press Accept (this will immediately receive that line item in PRS, and create receiving stock movements of that product to that location if it is a stock item)
- The line item will move over to the right column, and be shown inside the location selected for it
Part B - Create a new location to receive to[edit | edit source]
- Pressing on the purple buttons allows a search and select of the Warehouse, Area and Job
- Select the Warehouse
- Select the Area inside the Warehouse
- Enter the name of the location you are creating
- Press Save (this will also check if a location with that name already exists, and will not allow a save if it does)
- The location for receiving the currently opened purchase order item line will now be the newly created location
Adding multiple items to multiple locations[edit | edit source]
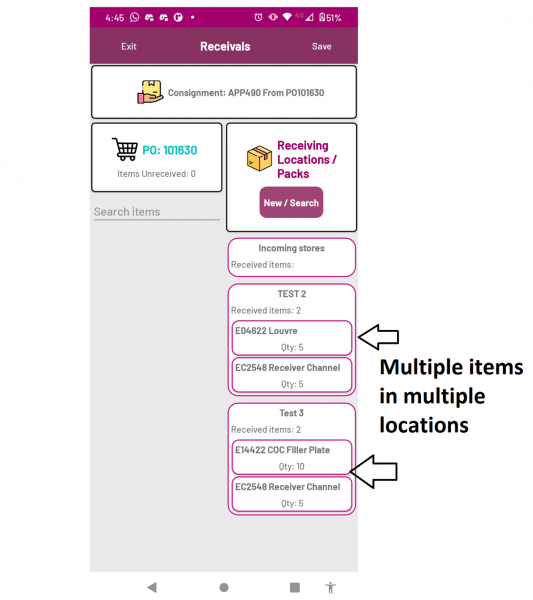
- Multiple items can be received to multiple locations, by adding the required locations to the list after tapping on an item to receive
- The items received and their quantities will be reflected on the right hand side, with each location showing the received items contained inside
Confirmation Page[edit | edit source]
- When ready to confirm the consignment, press Save
- Add photos and notes as required and then press Save. It is recommended to take a photo of the delivery docket in order to keep the records of such documents with the relevant consignment, purchase order and stock movement transactions
