Difference between revisions of "Setting Up Two-Factor Authentication"
Jump to navigation
Jump to search
| (2 intermediate revisions by the same user not shown) | |||
| Line 1: | Line 1: | ||
1. Ensure you have the Security Token to Edit Users (see Security Tokens) | 1. Ensure you have the Security Token to Edit Users (see [[Security Tokens]]) | ||
2. Click on Human Resources → User Accounts → Double click on the User to edit | 2. Click on Human Resources → User Accounts → Double click on the User to edit | ||
| Line 8: | Line 6: | ||
2.2 Select the type of Authenticator to use | 2.2 Select the type of Authenticator to use | ||
[[File:Enable 2FA2.png|none|thumb]] | [[File:Enable 2FA2.png|none|thumb|828x828px]] | ||
| Line 16: | Line 14: | ||
3.1 Open Google Authenticator on your device and scan the QR Code | 3.1 Open Google Authenticator on your device and scan the QR Code | ||
[[File:QR_code.png|frameless]] | [[File:QR_code.png|frameless|716x716px]] | ||
Latest revision as of 09:22, 3 February 2023
1. Ensure you have the Security Token to Edit Users (see Security Tokens)
2. Click on Human Resources → User Accounts → Double click on the User to edit
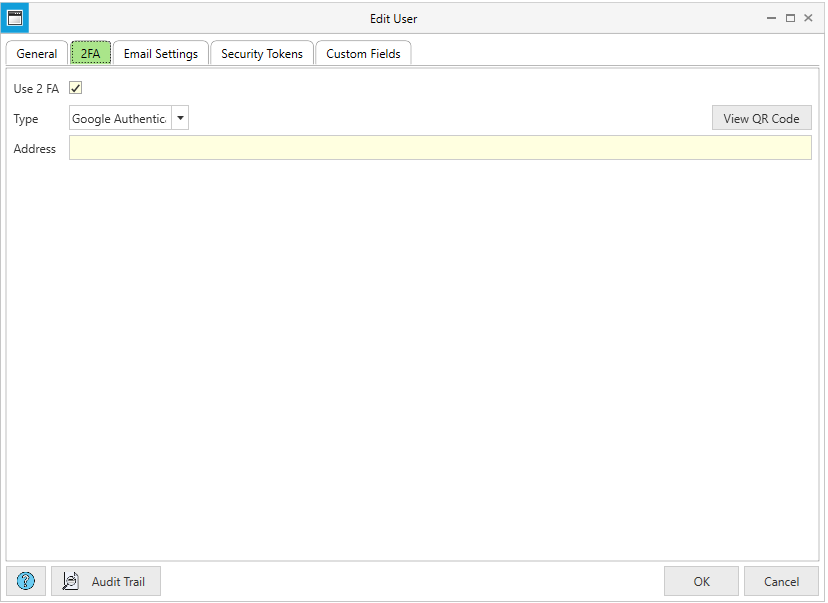
2.1 Check "Use 2FA"
2.2 Select the type of Authenticator to use
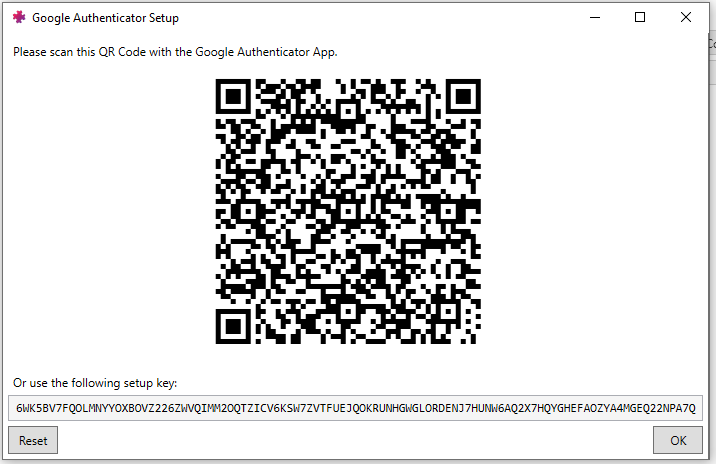
3. For Google Authenticator type, press "View QR Code" to generate the QR Code
3.1 Open Google Authenticator on your device and scan the QR Code

